UR ROS Controller
This tutorial firstly detail how to the robot controller communicates witht the robot. Secondly, it details how to use the controller in your project.
How is ur_robot controlled
In this section, we explain how ur robots are controlled with ros from Cartesian, joint control to velocity control. Basics knowledge on ROS might be necessary to understand this tutorial (tutorials).
Cartesian and Joint control
When launching the robot bringup, some rosaction servers are instantiated and waiting for command to be send.
- ROS Action
ROS Action are like ROS services, it’s all about request/reply communication. A service Client node sends a request to a Server node. The Server node then replies to that request. However, there may be some situations when the service Client wants to cancel a request or get periodic feedback on the status of the requests. Fortunately, ROS has a solution for that and it’s call ROS’s actionlib package.
In our case where we want to control the robot in Cartesian and joint space, the robot creates two action servers :
- JointServer →
/scaled_pos_joint_traj_controller/follow_joint_trajectory - CartesianServer →
/pose_based_cartesian_traj_controller/follow_cartesian_trajectory
The robot controller explained here, use those actions to control the robot.
Velocity control
To use velocity control on ur_robot, you need to set the robot controller as twist_controller. This can be done by edit the robot bring launch command as mentioned below or by sending a request to change controller using rosservice as explain here. In the last case of using rosservice, you can set cmd_vel = geometry_msgs::Twist() in order to send a 0 as velocity. Then as the controller will be switched to twist_controller, you can use the package proposed below.
roslaunch ur_robot_driver <robot_type>_bringup.launch controllers:="twist_controller" robot_ip:=192.168.1.3 kinematics_config:=${HOME}/ur10.yaml
Once you set the twist_controller, the robot is waiting for velocity to be published on /twist_controller/command topic. You can use the following .zip file as an example.
To run this package, you need to run the following command :
rosrun velocity_publisher velocity_publisher
Robot bringup
In order to start the robot driver and enable the communication with ROS, you have to run the following bringup command
roslaunch ur_robot_driver <robot_type>_bringup.launch robot_ip:=192.168.1.3 kinematics_config:=${HOME}/ur10.yaml
where **
Run Demo
This demo will move the robot to a desired joint pose. Feel free to edit this pose by looking at the user interface screen and note down the value to /src/DemoTrajectoryController .
#include <ur_controller/TrajectoryController.h>

int main(int argc, char** argv) {
    ros::init(argc, argv, "trajectory_sender");
    ros::NodeHandle nh;

    TrajectoryController sender(nh);

    sensor_msgs::JointState joints;
    // Edit value here
    joints.position = {-0.03298672, -1.52978109, -1.72229091 , 3.06846336 ,-1.65125601, -1.58929682};
    joints.velocity  = {0.001, 0, 0, 0, 0, 0};

    sender.sendJointTrajectory(joints, 5);

    // here you can call sendCartesianTrajectory to move to cartesian pose
    // The transition from joint to cartesian is transparent

    ros::spin();
    return 0;
}
To run the demo :
roslaunch ur_controller DemoTrajectoryController.launch
Robot Controller
In order to be able to control the robot from an external package, you can use the ModeRobot ros service. This ros service is used to send “move” request to the controller.
Run Robot Controller
To instantiate the rosservice server and send the command to the robot, you need to launch the robot controller :
roslaunch ur_controller TrajectoryController.launch
If you want to control your robot by sending relative cartesian position in the end effector reference, you can add the following parameter to the command : relative:=true. Then all the position that are sent to the robot must be given relatively to the end effector reference.
Then using the MoveRobot service embedded inside ur_controller you can ask to move the robot following cartesian, joint or velocity command.
MoveRobot rosservice
You need to set a control_mode telling which method should be used (Cartesian, Joint, Velocity). Then depending on the control_mode you must feed the associated field.
- Cartesian → poses (geometry_msgs/Pose[])
- Joint → jointStates (sensor_msgs/JointState[])
- Velocity → cmd_vel (geometry_msgs/Twist)
In addition to that, you must set the time_actions field. It defines the time to reach a pose. It can be ignore in case of Velocity control mode.
[ optional ] You also have the possibility to send gripper command (gripper field). This allows you to move the gripper after reaching a pose. The range value is [0-255], with 0 meaning closed. The size of gripper array must be the same as the poses array.
string control_mode
geometry_msgs/Pose[] poses
std_msgs/Int16[] gripper
sensor_msgs/JointState[] jointStates
float32[] time_actions
geometry_msgs/Twist cmd_vel
---
bool result
MoveRobot usage
To use MoveRobot service, you must have some knowledge on rosservice. Feel free to check to following page to learn about it : http://wiki.ros.org/rosservice/Tutorials.
We provide a C++ and Python example.
To run the C++ example, you can use the following command. By default this controller use Cartesian control. Note that before running the following command you must update the pose coordinates. As the pose orientation must be given as a quaternion, you can use the following website to do the conversion by filling the axis with angle magnitude fields.
rosrun ur_controller ur_control_service_client_example
You can edit the file https://github.com/ThomasDuvinage/ur10_robotiq_control/blob/main/ur_controller/src/rosservice_client_example.cpp to try different control modes.
ℹ️ ur_robot_driver might through some error message concerning controller changes when running the command above. You can ignore this message.
// Create an instance of the srv request type
ur_controller::MoveRobot srv;

/****** CARTESIAN CONTROL ******/

geometry_msgs::Pose pose;
pose.position.x = 0.640;
pose.position.y = 0.280;
pose.position.z = 0.600;
pose.orientation.x = 0.4905349;
pose.orientation.y = -0.59114;
pose.orientation.z = 0.4857658;
pose.orientation.w = -0.4170858;

// Fill in the two values that will be sent to the Service Server
srv.request.control_mode = "Cartesian"; // Cartesian or Joint or Velocity
srv.request.poses = {pose};         // Poses to move to
srv.request.time_actions = {5};     // time per action in s

// Example to use the gripper at the end of the move
std_msgs::Int16 gripper_cmd;
gripper_cmd.data = 120;
srv.request.gripper = {gripper_cmd};

/*******************************/

/****** JOINT CONTROL ******/

sensor_msgs::JointState joints;
joints.position = {-0.03298672, -1.52978109, -1.72229091 , 3.06846336 ,-1.65125601, -1.58929682};
joints.velocity  = {0.001, 0, 0, 0, 0, 0};

srv.request.control_mode = "Joint";     // Cartesian or Joint or Velocity
srv.request.jointStates = {joints}; // Poses to move to
srv.request.time_actions = {5};     // time per action in s

/*******************************/

/****** VELOCITY CONTROL ******/

geometry_msgs::Twist vel;
vel.linear.x = 0.1;
// Fill the other cordinates

srv.request.control_mode = "Velocity";
srv.request.cmd_vel = vel;

/*******************************/
Run LLM Experiment
-
First run the bringup of the robot
roslaunch ur_robot_driver ur10_bringup.launch robot_ip:=192.168.1.3 kinematics_config:=${HOME}/ur10.yaml -
Run the LLM Controller
roslaunch ur_controller LLM_experiment.launch
TODO add more content here
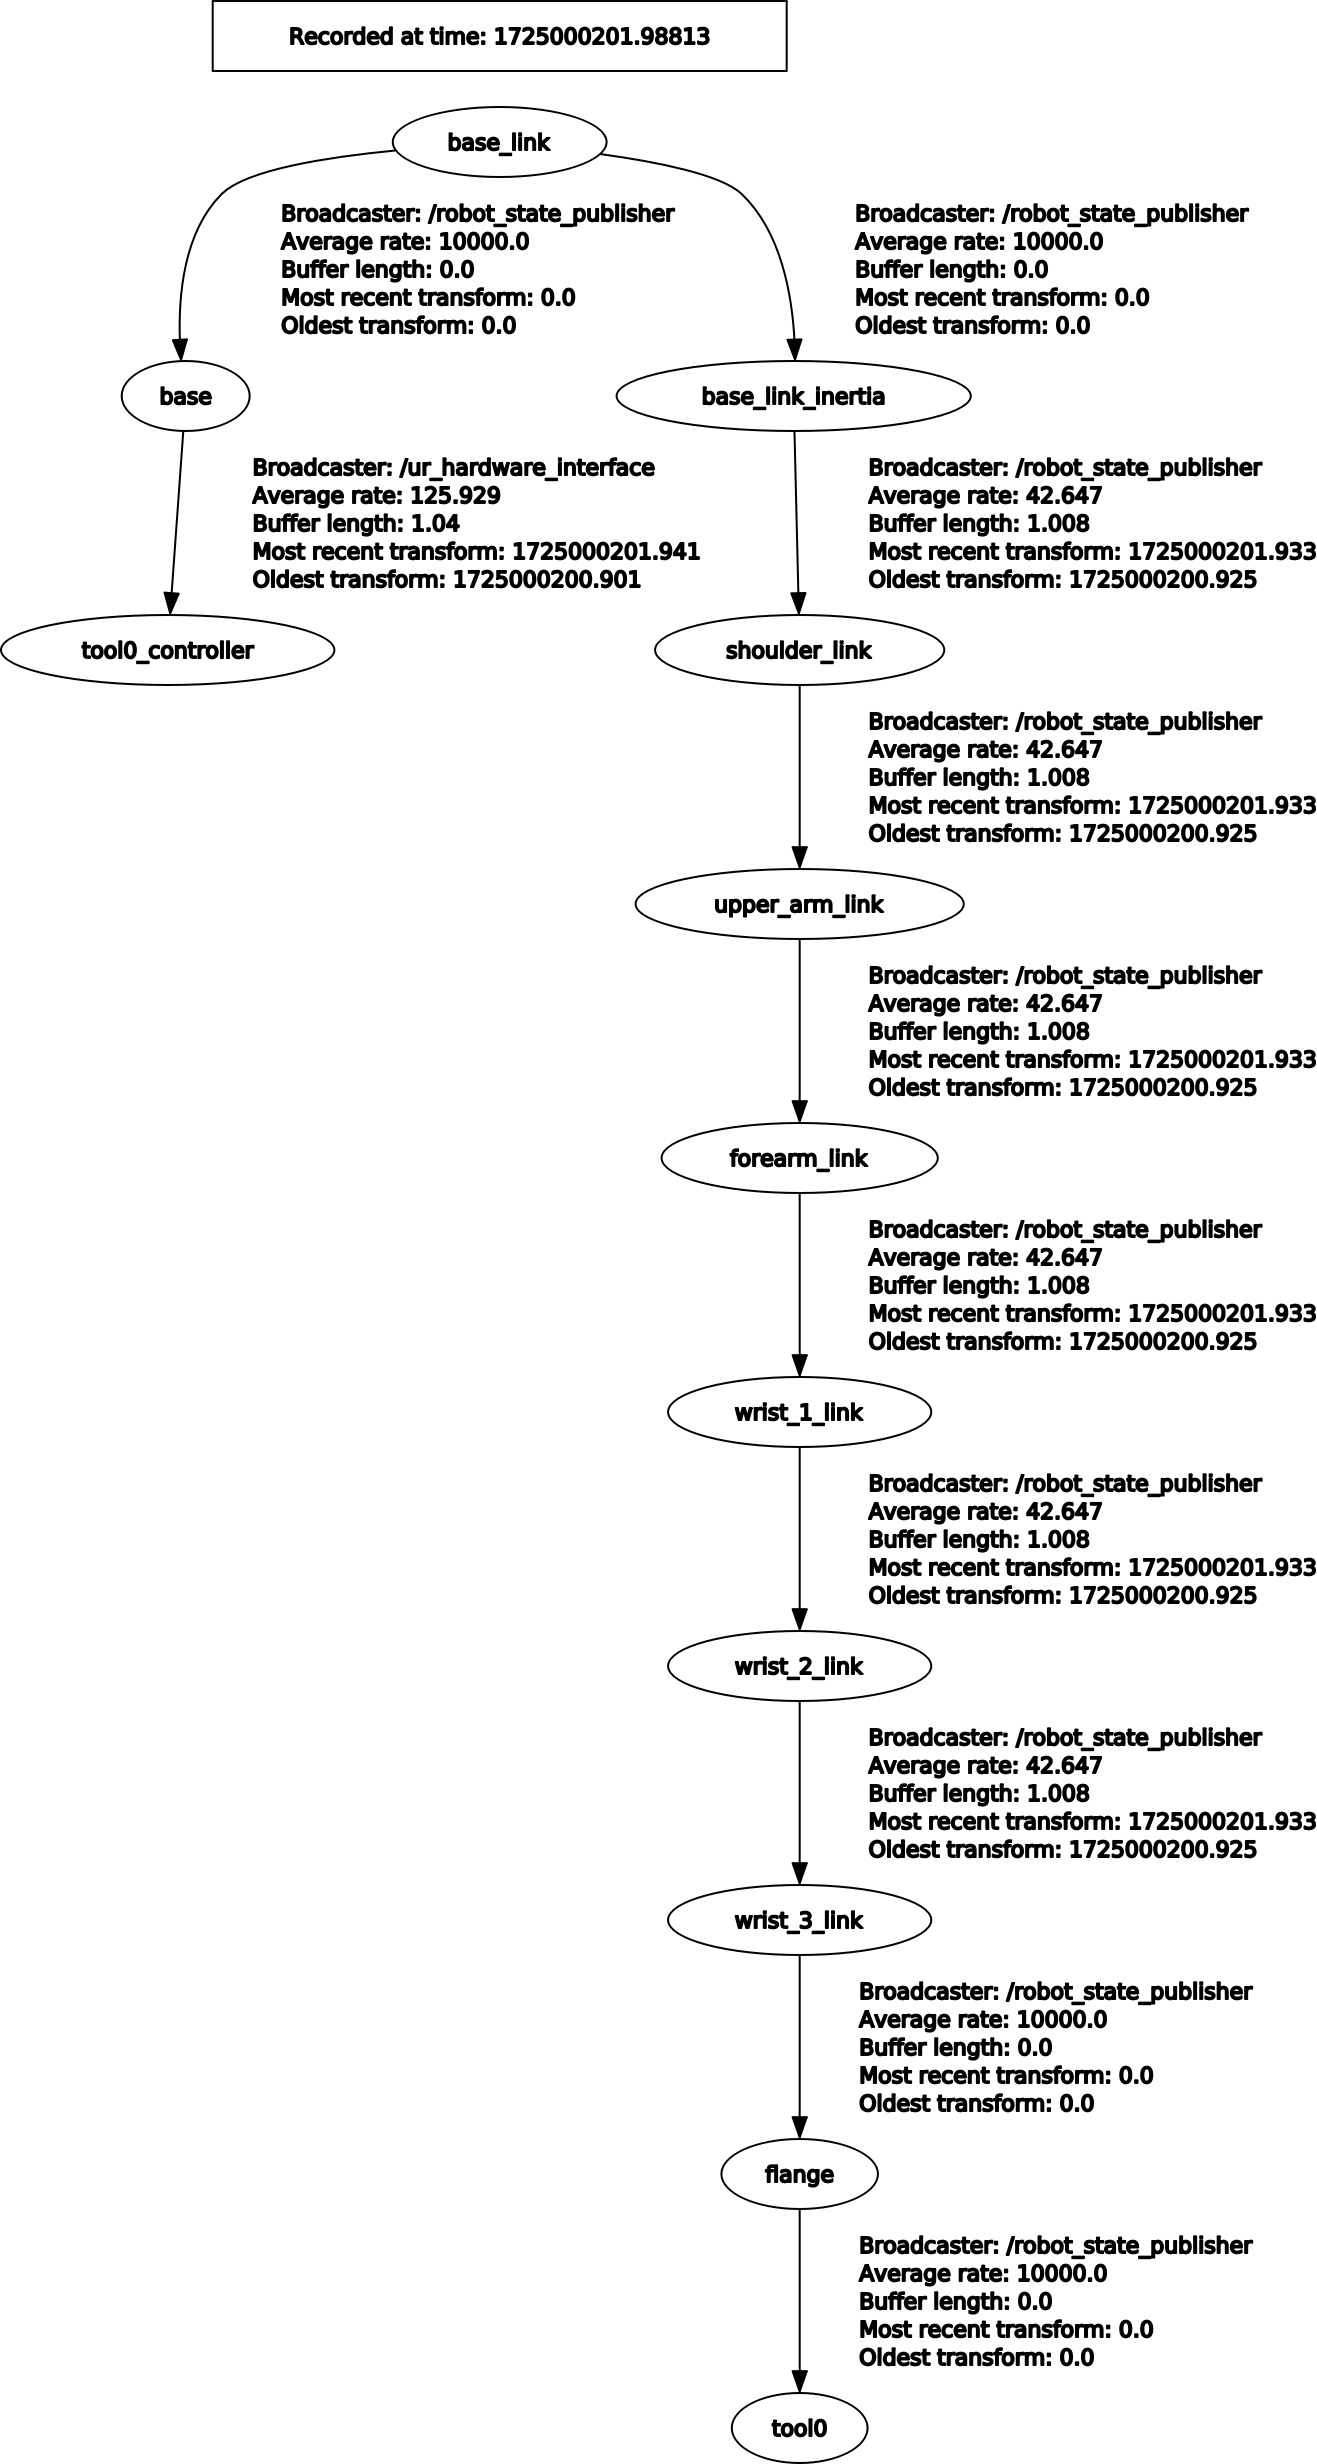
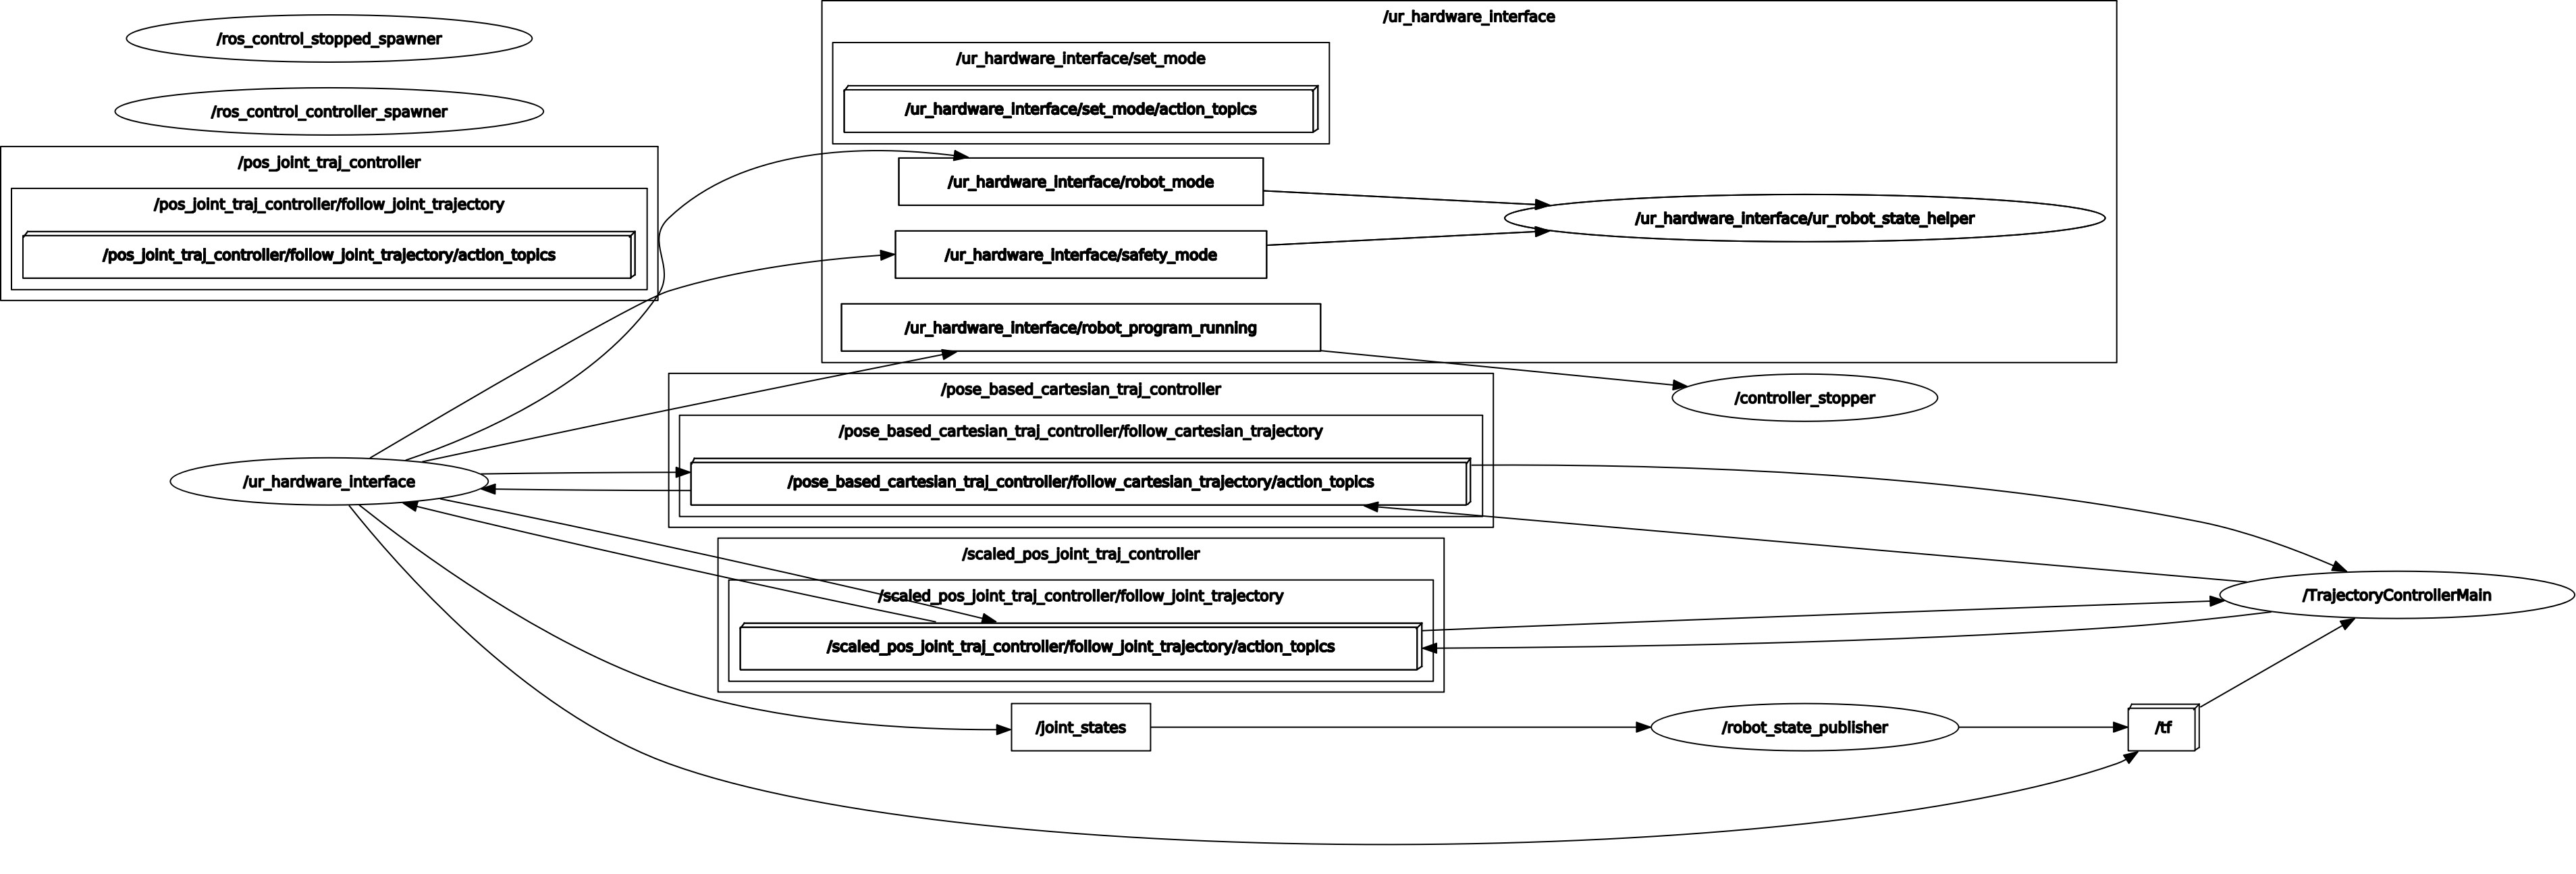
ROS Graph
- TF Graph
Troubleshooting
- TF
If you can to get the current end effector pose relative to the base, you can run the following command :
rosrun tf tf_echo base tool0_controller
- UR
Please refer to this page : https://github.com/UniversalRobots/Universal_Robots_ROS_Driver/tree/master#troubleshooting